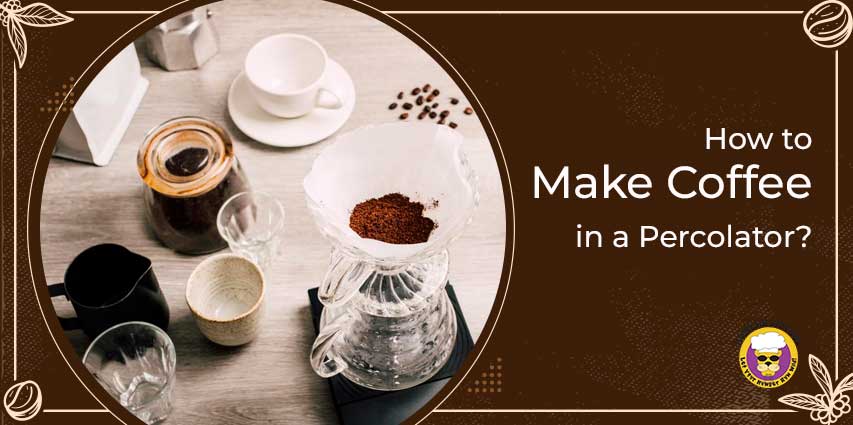
Are you a coffee enthusiast looking for a unique brewing experience? Have you ever wanted to try how to make coffee in a percolator? Look no further! Percolators are special kinds of brewers that can create flavorful cups of freshly brewed coffee — and with the right technique, you can master this classic craft.
In this blog post, we’ll provide the step-by-step instructions needed to make delicious coffee from your vintage percolator. From choosing the perfect grind size to experimenting with different flavors, read on for everything you need to know about how to make excellent tasting java using one of America’s oldest brewing methods!
What’s a Percolator?
A percolator is a type of coffee brewer that dates back to the 19th century. This classic method relies on gravity and steam pressure to push hot water up a tube and over the grounds. The process creates an intense, flavorful cup of coffee that’s sure to please any fan of this caffeinated beverage!
Related article: What Is Frappuccino Roast?
How to Make Coffee in a Percolator?
- 1. Start by filling your percolator with cold water. Pour the desired amount of cold water into the reservoir of your percolator, and then place it on the stovetop or heat source.
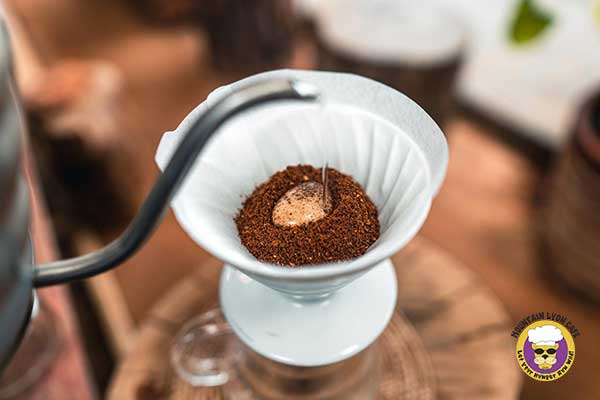
- 2. Once you’ve filled up the reservoir, add your coffee grounds to the filter basket. Find a grind size that is appropriate for a percolator — generally, a medium to coarse grind is best.
- 3. Insert the filter basket into the reservoir. Make sure that it fits securely before you turn on the heat source. Once you’ve inserted the filter basket, put on the lid and plug in your percolator if needed.
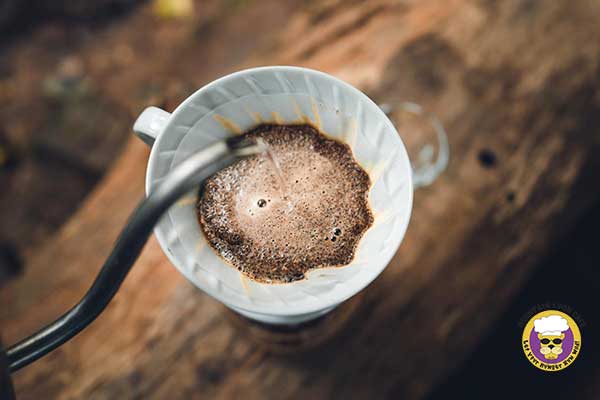
- 4. Turn up the heat! Once your percolator is plugged in or placed on the stovetop, turn up the heat to medium-high. This will allow the water to reach a steady boil, which will push it through the filter basket and over the grounds.
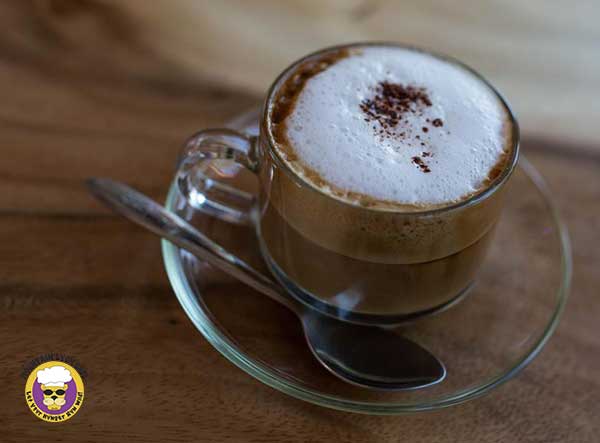
- 5. Let it brew! Allow your coffee to steep for 3-4 minutes or until it reaches the desired strength. Once your coffee is brewed, turn off the heat and remove the lid.
Essential Ingredients for Percolator Coffee
To make a great cup of coffee in your percolator, you’ll need the following ingredients:
- Coarsely ground coffee beans
- Cold water
- A percolator with the correct size filter basket
Instructions for Making Percolator Coffee
- Start by measuring 1 tablespoon of coffee per 6 ounces of water. If you’d like a stronger cup, add an additional tablespoon.
- Place the coffee grounds into the filter basket and gently press down to ensure that it’s firmly placed in the basket.
- Fill the percolator with cold water up to the desired level and attach the lid securely.
How Does a Percolator Work?
Percolators rely on gravity and steam pressure to brew coffee. The hot water is forced up the tube, past the grounds, and into a chamber where it collects at the top of the brewer before dripping back down over the coffee grounds. This cycle is repeated until your desired flavor strength is achieved.
During this process, you can expect to see the water boiling and rising up, while also watching the coffee grounds expand as they’re infused with flavor.
What Kind Of Coffee To Use In A Percolator?
When it comes to percolator coffee, you’ll want to use a medium-coarse grind size. This ensures that the grounds are not too fine or too coarse, allowing your coffee to steep and flavor to be extracted properly. Also, make sure to opt for high-quality beans — this will ensure that your coffee is full-bodied and flavorful.
Should You Use A Filter In A Percolator?
Enjoy a deliciously satisfying cup of coffee with your percolator! It’s easy – just remember to grind the beans correctly. Too fine, and you’ll end up sipping on grounds; too coarse and you won’t maximize all that rich flavor potential. A metal brew basket makes it effortless by keeping the freshly ground goodness while allowing water to drip through small holes in its base for an optimal brewing experience.
Avoid a gritty morning by using percolator filters! Not only do they keep coffee grounds out of your cup, but they also reduce the amount of natural oils that have been known to take away from the flavor. Enjoy each sip with better tasting and smoother results – thanks to filters!
How To Make Coffee On A Camp Stove?
Making coffee on a camp stove is a great way to enjoy your morning cup of joe while you’re out in the wilderness. Although it may seem daunting at first, all you need is a few supplies and some mastery over heat control for an excellent camping brew.
Essential Supplies
The following items are necessary for camping coffee:
- A camp stove with fuel
- Coffee grounds
- A percolator or French press (for best results)
- Filters, if you’re using a percolator
- A spoon for stirring and measuring the grounds
- Cold water
Instructions:
- Step 1: Fill your percolator or French press with cold water.
- Step 2: Add the desired amount of coffee grounds to the filter basket or directly into the carafe, depending on what type of brewer you’re using.
- Step 3: Place your brewer on the stove and turn up the heat to medium-high. Allow it to reach a steady boil, and then reduce the heat to low.
- Step 4: Let your coffee steep for 3-4 minutes or until it reaches the desired strength.
- Step 5: Turn off the heat and remove your percolator or French press from the stovetop. Serve and enjoy!
Making delicious coffee on a camp stove isn’t hard, but it does require some practice. With these tips and a bit of patience, you’ll be able to make the perfect cup of coffee whenever your heart desires! Happy sipping!
Percolator vs. Other Brewing Methods
Percolators are different from traditional brewers such as drip or French press machines.
Unlike these methods, a percolator keeps the water boiling until it has passed through the grounds several times — resulting in a strong, flavorful cup of coffee. Tips for Using a Percolator
- Use cold water every time – hot water will cause coffee to be over-extracted and taste bitter.
- Don’t forget to empty the grounds from the filter basket after each use to prevent them from becoming stale.
- Experiment with different types of beans for a variety of flavors.
- Start with more coffee grounds for a stronger cup of brew.
- Don’t overfill the percolator – too much water will create an overly strong flavor.
- Let the brewed coffee rest for 1-2 minutes before serving to allow flavors to develop and settle.
- Always use coarsely ground beans in order to avoid clogging the tube.
- Be sure to pre-heat the percolator before adding coffee grounds and water for optimal brewing results.
- Percolators can take longer than other methods of brewing, so be patient while your cup brews!
What is the best coffee for a percolator?
The best coffee for a percolator is a coarsely ground dark roast. Dark roasts have more oils, which are necessary for optimal flavor extraction in the percolator’s boiling process.
However, any type of coffee bean can be used to make a great cup of coffee with a percolator! Just remember to use coarse grounds for the best results.
What Is The Difference Between A Percolator And A Moka Pot?
The main difference between a percolator and a moka pot is the type of brewing process used. A percolator circulates boiling water through the grounds, while a moka pot uses pressure to force steam and hot water up through the coffee. How much coffee do you put in a percolator?
The amount of coffee grounds you use in a percolator will depend on how strong you prefer your brew. Generally, start with 2 tablespoons of coarsely ground beans per 6 ounces of water and adjust to taste. Be careful not to overfill the filter basket so that the water can easily circulate through the grounds!
What is the best way to clean a percolator?
The best way to clean a percolator is with warm, soapy water and a soft brush or cloth. Be sure to rinse out any residue and then dry the pot thoroughly before storing it away. You can also use vinegar and baking soda for more stubborn stains if needed!
How long do you let coffee percolate in a percolator?
The amount of time it takes for coffee to percolate in a percolator will depend on the type of beans you are using, as well as how strong you prefer your brew. Generally, allow your coffee to percolate for at least 5 minutes and up to 10 minutes for optimal flavor extraction. Be sure to keep an eye on the pot and adjust the heat accordingly for best results.
We hope this post has provided you with all of the information needed to get started with percolator coffee brewing — happy brewing! With a little practice, patience, and experimentation, you can master the art of making delicious cups of java from the comfort of your home. Bon appétit!
Stovetop Percolators: An Active Brewing Method for Great Coffee
Stovetop percolators are an active method of coffee brewing that uses boiling water to extract flavor from the coffee grounds. This process has been around since the 19th century and is still one of the most popular ways to make a great cup of joe! To use a stovetop percolator, start by filling the bottom chamber with cold water.
Place the ground coffee in the filter basket, then place the top of the percolator over the lower chamber and heat on a stovetop burner or campfire. As the water boils, it is forced up through a pipe that passes through the grounds to create a highly concentrated cup of brewed coffee.
When using a percolator, it is important to use the correct grind size and not to overfill the filter basket. Coarsely ground beans are recommended as they will increase the surface area of extraction during brewing and result in a better cup of coffee. Also, be sure to check your percolator’s instructions be- fore use, as some models may require pre-boiling the water or adjusting the heat.
How to Make Coffee With a Stovetop Percolator?
Making coffee with a stovetop percolator is easy and can produce great results!
Start by filling the bottom chamber of your percolator with cold water. Place the filter basket in the top chamber, then add 2 tablespoons of coarsely ground coffee per 6 ounces of water.
Place the top over the lower chamber and heat on a stovetop burner or campfire until the water begins to boil. As the water boils, it is forced up through a pipe that passes through the grounds and back down into the bottom chamber. Once you can no longer hear bubbles rising, your coffee is ready! Be sure to adjust the heat accordingly for best results.
FAQs
Q. What is the best way to clean a percolator?
A. The best way to clean a percolator is with warm, soapy water and a soft brush or cloth. Be sure to rinse out any residue and then dry the pot thoroughly before storing it away. You can also use vinegar and baking soda for more stubborn stains if needed! Additionally, it’s important to empty the filter basket after each use and wash it with warm, soapy water for optimal results.
Q. How long do you let coffee percolate in a percolator?
A. The amount of time it takes for coffee to percolate in a percolator will depend on the type of beans you are using, as well as how strong you prefer your brew. Generally, allow your coffee to percolate for at least 5 minutes and up to 10 minutes for optimal flavor extraction. Be sure to keep an eye on the pot and adjust the heat accordingly for best results.
Q. What is the difference between a percolator and a French press?
A. The biggest difference between a percolator and a French press is the method of extraction. A percolator uses boiling water to force hot water up through the coffee grounds and back down into the lower chamber, while a French press uses gentle pressure and gravity to push cold water through the grounds. Both methods result in a great cup of coffee, but the percolator is faster and more efficient in brewing time.
Overall, if you’re looking to make a delicious cup of java from home without breaking the bank, then a stovetop percolator might be just what you need! With a little practice
Conclusion
Making coffee in a percolator is an excellent way to guarantee a delightful cup of aromatic, smooth coffee. It does take some effort and skill to ensure that perfect balance between water and coffee grounds, as well as time for the coffee to brew over heat, so it’s important to master How to Make Coffee in a Percolator?
Understanding this process requires knowledge of the equipment itself, including what ratio of ground coffee and water to add, which type of grind to use and how long the coffee should steep before serving. When perfected, this traditional brewing method produces one of the most flavorful cups of drip-brewed coffee around.
My name is Kara Chavez, and I love coffee. I love making the best coffees – espresso, latte, macchiato. I always strive for perfection in my barista skills, and I take great pride in bringing delicious cups of coffee to my customers.
I’ve been in the coffee industry for many years, and I know everything there is to know about brewing the perfect cup of coffee. My passion for coffee shines through in every cup I make, and I hope you’ll stop by soon so I can share my love of coffee with you!