Learn how to make latte art at home with this complete guide. Discover the right tools, milk frothing techniques, step-by-step pouring methods, and common mistakes to avoid. Impress yourself and others by creating café-quality latte art in your kitchen.
How to Make Latte Art at Home: Step-by-Step Guide
For many coffee lovers, sipping a cappuccino or latte adorned with a delicate heart, tulip, or rosetta design is more than a treat—it’s an experience. While latte art has long been the domain of skilled baristas, the truth is you can learn how to make latte art at home with patience, practice, and the right techniques. With a few essential tools, attention to detail, and some insider tips, you can transform your kitchen into a personal café and impress both yourself and your guests.
Step-by-Step Guide: How to Make Latte Art at Home
The journey to creating beautiful latte art designs begins with mastering the foundations: the espresso base, the milk texture, and the pouring technique. Just as painters rely on a well-prepared canvas, baristas depend on properly brewed espresso and perfectly frothed milk.
Tools and Equipment You’ll Need
Before you start pouring, gather the essentials:
Espresso machine or moka pot capable of producing a rich espresso shot with crema
Milk frothing pitcher (12–20 oz stainless steel) with a narrow spout for precision pouring
Fresh whole milk or alternatives like oat milk (noted for excellent frothing ability)
Thermometer (optional, but useful for beginners)
Tamper for evenly compressed espresso grounds
Without these basics, latte art becomes frustrating. Think of these tools as your paintbrushes and palette.
Read more: How to Brew Coffee with Chemex: A Complete Guide 2025
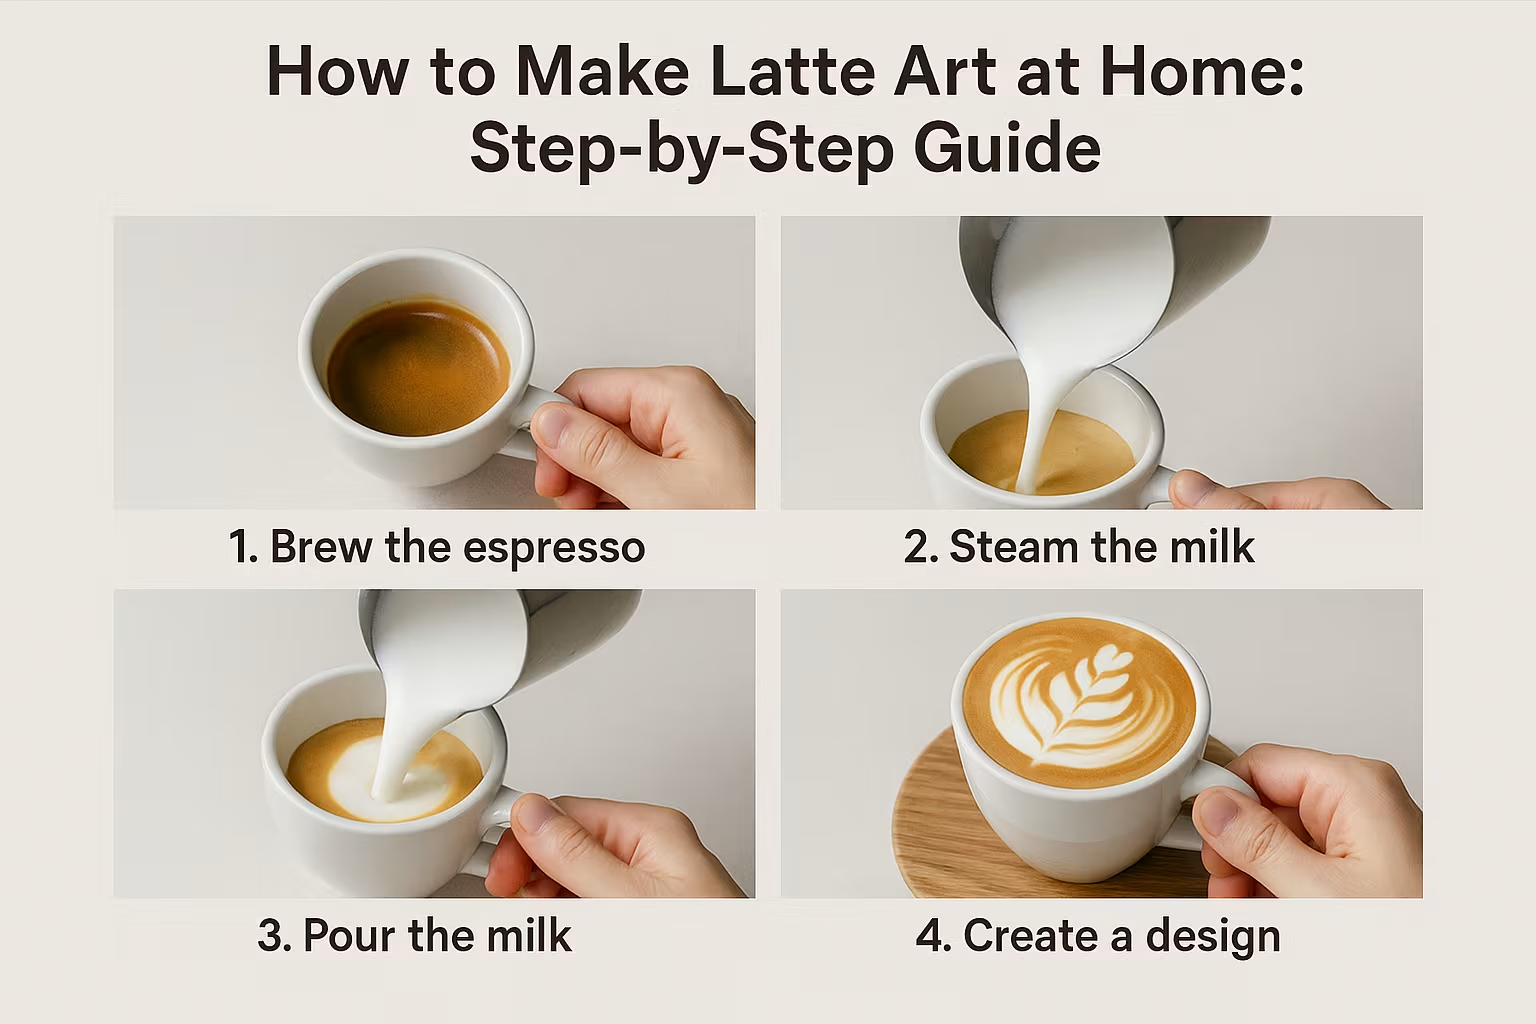
Step 1: Pulling the Perfect Espresso Shot
At the heart of every latte is a strong, balanced espresso shot. Grind your coffee beans to a fine consistency and tamp evenly. Brew using your espresso machine or moka pot. The goal is to achieve a shot with a layer of golden crema, as this forms the foundation upon which your latte art will sit.
Pro tip: The Specialty Coffee Association (SCA) recommends 18–20 grams of coffee for a double espresso shot, extracted in 25–30 seconds. Following this guideline ensures consistency.
Step 2: Frothing Milk to the Right Texture
Milk texture is the soul of latte art. The goal is to create microfoam, milk infused with tiny bubbles that form a silky, paint-like texture. Heat the milk to 140–150°F (60–65°C), keeping the wand just below the surface to incorporate air before fully submerging it to heat.
Signs of perfectly frothed milk include:
A glossy sheen, almost like wet paint
Smooth consistency without visible bubbles
Soft hissing sound during aeration, not loud screeches
If your milk is too foamy, your art will break apart. If it’s too thin, it won’t hold a design. Balance is everything.
Step 3: Pouring Techniques for Latte Art
Once you have espresso and silky microfoam, it’s time for the artistry. Latte art pouring requires both control and rhythm. Hold your cup at a slight angle, start high to mix the milk and espresso, then lower the pitcher as the cup fills to allow foam to rise. Movements should be smooth, not rushed.
The Heart Design
The most beginner-friendly design. Begin by pouring into the center of the espresso. When the cup is about halfway full, lower the pitcher closer to the surface and let the foam form a white circle. With a quick flick forward at the end, drag the stream through the circle to create a heart.
The Rosetta
An intermediate pattern resembling a fern leaf. Start by pouring a thin stream into the center, then wiggle your hand gently side to side as you move the pitcher backward. The motion creates layers of leaves. Finish with a straight pull-through to form the stem.
The Tulip
Considered advanced, the tulip is a series of layered hearts stacked on top of each other. Pour a small circle, stop briefly, pour another overlapping it, and continue until you have three or four layers. Pull through the middle to complete the tulip.
Each design builds on the same principles of milk flow, distance, and movement, much like calligraphy where small changes in angle and pressure alter the shape of the letters.
Tips for Better Latte Art Results at Home
Even with careful preparation, home baristas often find their first pours messy or unclear. Don’t worry—latte art is a skill built through repetition. Here are expert tips to refine your results.
Choosing the Right Milk Type
Whole milk: Best for beginners due to its fat content, which creates stable microfoam.
Oat milk: Popular among plant-based options, producing a smooth froth comparable to dairy.
Almond or soy milk: Can work, but often separate when heated, requiring practice.
Controlling Milk Temperature
Keep your milk within the 140–150°F range. Milk that is too hot loses sweetness and becomes flat, while cooler milk may not integrate well with espresso. Use a thermometer until you develop intuition for the right temperature.
Practicing Hand Movements
Latte art is as much muscle memory as it is technique. Practicing the motions of steady pouring, gentle wiggling, and pulling through with water and soap suds in a cup can mimic milk texture without wasting coffee.
As the proverb goes: “Practice is the best of all instructors.” The more you pour, the smoother your designs will become.
Common Mistakes When Making Latte Art
Like any skill, beginners often stumble on similar mistakes. Recognizing them early will save frustration.
Overheating or Underheating Milk
Milk scalded beyond 160°F tastes burnt and won’t create proper foam. Underheated milk lacks body. Stick to the sweet spot of 140–150°F for consistency.
Foam Too Thick or Too Thin
Too thick: The foam floats on top like meringue, preventing integration with espresso.
Too thin: Designs sink and disappear into the coffee.
Aim for glossy microfoam with tiny, uniform bubbles.
Pouring Too Fast or Too Slow
A rushed pour floods the cup and blurs designs, while a slow pour prevents foam from rising. Find a balance: start slow for integration, then accelerate slightly to let the foam float and form patterns.
Latte Art for Beginners vs Advanced Techniques
Learning how to make latte art at home is like learning a language—you start with simple words before composing poetry. Progression is natural, and each stage teaches valuable skills.
Simple Designs for Starters
Beginner-friendly designs include the dot and the heart. The dot is simply letting the foam settle on top of the espresso in a round shape, a first lesson in control. The heart, as described earlier, builds on this by dragging the pour through the dot to create symmetry. These designs give confidence and build the muscle memory needed for more complex pours.
Moving Toward Complex Patterns
Once comfortable, home baristas can attempt the tulip and rosetta. The tulip involves layering hearts, while the rosetta requires a steady wiggle of the pitcher while pulling back. These patterns highlight the importance of consistency in milk texture and hand rhythm. A steady hand and the right wrist motion are key—the same steadiness an artist shows when sketching fine details.
Free Pour vs Etching Techniques
There are two main artistic approaches:
Free Pour: Designs created during the pour, such as hearts, tulips, and rosettas.
Etching: Using tools like toothpicks or latte art pens to draw intricate designs after pouring, often combined with syrups or powders.
While free pour is the traditional barista method, etching allows for creativity at home, especially if your milk frothing isn’t yet perfect.
Benefits of Learning Latte Art at Home
Latte art is not just about aesthetics—it enriches your coffee journey in many ways.
Elevating Your Coffee Experience
Creating latte art transforms an ordinary cup into a moment of mindfulness. The process forces you to slow down, focus, and engage all your senses. Much like Japanese tea ceremonies, it is a ritual that elevates the everyday into the extraordinary.
Impressing Family and Guests
Serving a homemade cappuccino with a heart or rosetta design can surprise and delight guests. Coffee becomes a form of hospitality and personal expression. As one barista once said, “Latte art is the smile you give before the first sip.”
Saving Money vs Café Visits
Investing in equipment may seem costly at first, but mastering latte art at home saves money long term. Consider the average price of a café latte at $4.50; making your own can cut the cost to under $1 per cup. Over a year, that’s hundreds saved—without sacrificing quality.
| Item | Café Cost (Average US) | Home Cost (Per Cup) | Savings |
|---|---|---|---|
| Latte | $4.50 | $0.90 | $3.60 |
| Weekly (5 cups) | $22.50 | $4.50 | $18 |
| Yearly (260 cups) | $1,170 | $234 | $936 |
The numbers reveal that latte art at home is not just rewarding—it’s financially wise.
Conclusion: Mastering How to Make Latte Art at Home
Latte art may seem intimidating, but with the right tools, practice, and mindset, it becomes a joyful skill that transforms coffee into art. Mastering how to make latte art at home is not about perfection but about progress. Every pour—whether a lopsided heart or a shaky rosetta—teaches control, patience, and creativity.
My name is Kara Chavez, and I love coffee. I love making the best coffees – espresso, latte, macchiato. I always strive for perfection in my barista skills, and I take great pride in bringing delicious cups of coffee to my customers.
I’ve been in the coffee industry for many years, and I know everything there is to know about brewing the perfect cup of coffee. My passion for coffee shines through in every cup I make, and I hope you’ll stop by soon so I can share my love of coffee with you!