
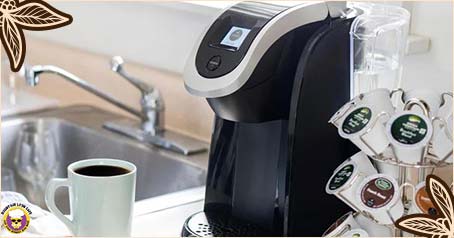
There’s nothing worse than making yourself a cup of joe and getting less than you bargained for. If your Keurig not brewing a full cup, it can be frustrating trying to find out the issue so that you can get back to enjoying those delicious cups of coffee again!
Are you a fan of the convenience and ease offered by your Keurig machine? We understand that having access to one-touch coffee is an essential part of many buyers’ morning routines, so it can be incredibly frustrating when something like a full cup not brewing correctly interrupts this sacred tradition.
What Causes a Keurig to Not Brew a Full Cup?
There are a few common reasons why a Keurig might not brew a full cup:
- Clogged needles. The upper and lower puncture needles on your Keurig are responsible for piercing the K-cup and allowing water to flow through. If these needles become clogged with coffee grounds, tea leaves, or cocoa powder, they can restrict the flow of water and prevent your Keurig from brewing a full cup.
- Scale buildup. Hard water can cause mineral deposits to build up inside your Keurig over time. This scale buildup can clog the water passages and reduce the flow of water to the K-cup.
- Airlock. If there is air trapped in the water lines of your Keurig, it can prevent the water from flowing properly and brewing a full cup.
- Faulty water pump. If the water pump in your Keurig is not working properly, it may not be able to generate enough pressure to force the water through the K-cup.
- Faulty brew basket. If the brew basket is not seated properly or if it is damaged, it can cause water to leak out and prevent your Keurig from brewing a full cup.
In addition to these common causes, there are a few other things that can cause your Keurig to not brew a full cup, such as:
- Using the wrong cup size. Make sure you are selecting the correct cup size on your Keurig. If you select a larger cup size than the K-cup is designed for, your Keurig will not brew a full cup.
- Not using enough water. If the water reservoir is not full, your Keurig will not be able to brew a full cup.
- A faulty K-cup. It is possible that the K-cup you are using is defective. Try using a different K-cup to see if that resolves the issue.
If you are having trouble getting your Keurig to brew a full cup, there are a few things you can do:
- Clean the needles. Use a paper clip or other small object to gently clean out the upper and lower puncture needles.
- Descale your Keurig. Use a Keurig-approved descaling solution to remove any scale buildup from your machine.
- Check for airlocks. Try running a water-only cleaning cycle to see if that clears out any airlocks.
- Contact Keurig. If you have tried all of the above and your Keurig is still not brewing a full cup, you may need to contact Keurig customer support for assistance.
Related article:
10 Starbucks Apple Drinks: Fruity & Refreshing For You!
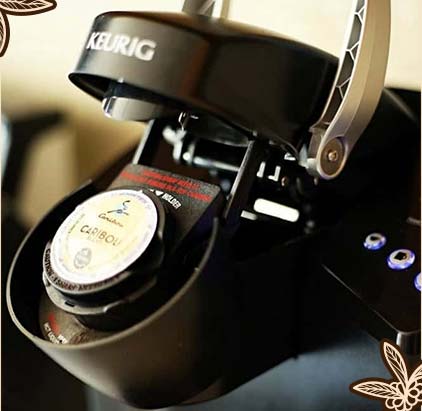
Clean the Entrance and Exit Needles
Start by powering off and unplugging your Keurig machine. Locate the entrance and exit needles inside the brewer head. Over time, coffee residue and debris can accumulate on these needles, hampering their functionality.
Using a paper clip or a specialized cleaning tool, carefully insert it into the holes of the needles. Gently move the tool in and out to dislodge any blockages. Ensure that all openings are clear before proceeding.
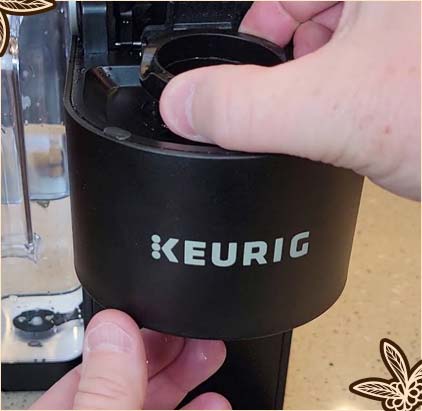
Align the Needles Properly
In some cases, the needles may become misaligned, leading to brewing issues. To realign them, start by removing the K-Cup holder assembly from your Keurig. Inspect the needles and ensure they are straight and parallel. If misalignment is detected, gently adjust them by hand until they are properly aligned.
Once you’ve completed these steps, reassemble the K-Cup holder assembly and plug in your Keurig. Run a test brew with water only to check if the problem is resolved. If necessary, repeat the cleaning and alignment process until your Keurig successfully brews a full cup of coffee.
Keurig Machine Calibration: Fine-tuning for Perfection
If you’ve exhausted the previous troubleshooting methods and your Keurig still isn’t brewing a full cup, it might be time to calibrate your machine. Calibration helps ensure that the internal settings are aligned correctly, leading to consistent and accurate brewing. Follow these steps to calibrate your Keurig:
Empty and Clean Your Keurig
Before proceeding with calibration, empty any remaining water from the reservoir and remove used K-Cups or pods. Give your Keurig a thorough cleaning to eliminate any potential obstructions.
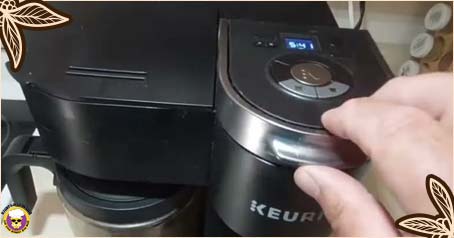
Access the Menu Settings
Switch on your Keurig and access the menu settings by following the instructions provided in your machine’s user manual. Each Keurig model may have a slightly different process, so consult the manual for accurate guidance.
Initiate Calibration Mode
Locate the calibration option within the menu settings and select it to initiate the calibration mode. The machine will guide you through the process step by step, often involving specific prompts such as water heating and dispensing cycles.
Follow On-Screen Instructions
Carefully follow the on-screen instructions during the calibration process. These steps typically involve pressing buttons or confirming certain actions. Ensure that you have a sufficient amount of water in the reservoir to complete the calibration successfully.
Once calibration is complete, restart your Keurig and run a test brew to verify if the issue has been resolved. If the problem persists, additional assistance from Keurig customer support may be required.
Pros and Cons of Keurig Coffee Makers
Like any appliance, Keurig coffee makers have their advantages and disadvantages. Let’s explore some of the pros and cons:
Pros:
- Convenience: Keurig machines allow for quick and easy brewing, perfect for busy mornings or when you only need a single cup.
- Variety: With a wide range of K-Cup flavors and brands available, Keurig offers versatility and options to suit different taste preferences.
- Portability: Some Keurig models are compact and portable, making them suitable for office spaces, dorm rooms, or travel.
- Customization: Many Keurig models feature adjustable brew strength and size settings, allowing you to personalize your coffee experience.
Cons:
- Cost: Keurig machines are generally more expensive upfront compared to traditional coffee makers. Additionally, purchasing K-Cups can be costlier in the long run than buying coffee grounds or beans.
- Environmental Impact: Single-use K-Cups generate plastic waste, contributing to environmental concerns. However, Keurig now offers reusable pods compatible with their machines, reducing the ecological footprint.
- Limited Specialty Coffee Options: Keurig primarily offers mainstream coffee brands, which may not cater to the preferences of those who enjoy specialty or artisanal coffees.
- Maintenance: Keurig machines require regular cleaning and descaling to ensure optimal performance and longevity.
My name is Kara Chavez, and I love coffee. I love making the best coffees – espresso, latte, macchiato. I always strive for perfection in my barista skills, and I take great pride in bringing delicious cups of coffee to my customers.
I’ve been in the coffee industry for many years, and I know everything there is to know about brewing the perfect cup of coffee. My passion for coffee shines through in every cup I make, and I hope you’ll stop by soon so I can share my love of coffee with you!